Monthly Archives: April 2009

Kool-Aid Style

Oh, yeah!

Kool-Aid rocked my socks when I was little. Picture a little blonde haired, sticky fingered, slobby shirt mini-me running around the neighborhood with a bright red tropical punch Kool-Aid mustache. It was pretty much a daily occurrence in the summer. We loved the stuff and drank it by the gallon. So many delicious fruit-filled flavors. And the colors! Oh, the spectrum of fake reds, blues and purples, ready to stain any sort of fabric, surface or skin it came in contact with. (Come on, everyone rocked a Kool-Aid stained t-shirt at some point in their life. Gotta coordinate with that mustache.) It wasn’t like it was pop or anything…so it’s not like it’s bad for you, right? True there is nothing in that powder that comes from any sort of fruit, but it’s mostly water so….can’t be too high in calories, don’t you think?

I actually have no clue about the nutritional value of this kiddie drink. I could look it up but…….yeah, not going to happen. Instead, I just spent a minute Googling and YouTube-ing (new word?) the Kool-Aid Man and wondering how it’s possible we didn’t all have nightmares as kids because that thing is all kinds of freaky-deaky.

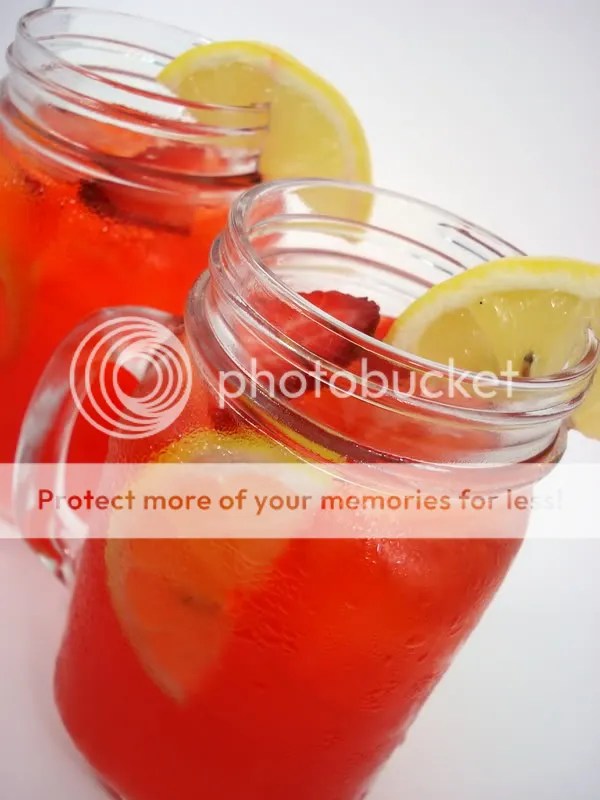
I had Kool-Aid on the brain because I made a SPECTACULAR Strawberry Lemonade over the weekend that turned out to be a gorgeous pinky-red that looks JUST like our childhood fave. The main difference…this one is all natural, made with real fruit and has not a speck of mystery chemical dye. And it tastes 110% better than anything from a powder or jug you can get at the store.

This fab summer drink gets its color from boiling strawberries and sugar in water, crushing up the fruit and straining out the pulp. Add your freshly squeezed lemon juice and ta-da! A delicious drink with a great color! I contemplated adding a bit more lemon juice, as I tend to like my lemonade drinks a bit more tart than the average person, but in the end I decided to follow the recipe exactly. Next time I will add more lemon. It’s very good as is, not overly sweet, but I need a bit more of a lemon punch.

STRAWBERRY LEMONADE (Recipe Source: MyRecipes.com)

INGREDIENTS:

  • 3  or 4 lemons
  • About 3/4 cup sugar
  • 1/2  teaspoon  salt
  • 1  cup  strawberries, hulled
  • Ice cubes (optional)
  • Thin lemon slices (optional)

DIRECTIONS:

1. Cut the lemons in half and ream juice from them. Pour the juice through a fine-mesh strainer into a measuring cup and discard the seeds and pulp. You should have 1/2 cup. Cover and refrigerate.

2. Place 4 cups water, 3/4 cup sugar, salt, and strawberries in a pan and bring to a boil over medium-high heat. Stir often with a spoon and, using the back of it, crush the berries. Continue to boil, stirring often, until the sugar has dissolved, about 2 minutes. Let cool, cover, and refrigerate until well chilled.

3. Pour the chilled syrup through a fine-mesh strainer into a pitcher; discard the pulp. Add the lemon juice to syrup and stir well. Taste, and adjust to desired sweetness.

4. Pour lemonade into glasses. Serve with ice cubes and garnish with thin lemon slices.

Note: Recipe makes four 8 oz. servings. Double to refresh more of your friends! 🙂

PS….aren’t these handled mason jar glasses super cute?? I LOVE them! They were on super clearance at World Market the last time I was there (um, not around here….we don’t have cool stores around here). When I saw they were less than a dollar each, I snatched them up! I just couldn’t resist!

9 Comments

Filed under drinks, fruit

My Bagel and Me: A Love Story

I LOVE bagels! Love them. My absolute favorite carb-o-rific snack. Circles of heaven with a hole in the center. Here’s the thing though….I don’t like bagels for breakfast! Say Whhhaaaaaaaaattt?? Seriously! A bagel is a favorite lunchtime treat for me, but I rarely eat them for breakfast. I don’t know if it’s just too much or too heavy for the morning or what, but I’d much rather have my bagel mid-day. I love the savory flavors…cheese, onion and my absolute fave: EVERYTHING! There’s just something about that crispy exterior and chewy interior that I cannot resist.

I never thought I’d be so confident in my abilities that I would take on making my own bagels. But, I had a free Sunday, due to a ridiculous rainstorm that dumped more than three and half inches of rain us all day long, and some new found kitchen confidence, so I decided to go for it. I had seen a couple of recipes floating around the cooking message board I frequent. I chose this one I saw at Pennies on a Platter (a blog I adore, BTW! Such wonderful, creative recipes!) that she adapted from Baking Bites because it seemed relatively easy. Guess what…it was! Not to mention absolutely delicious! So freakin good. The texture and taste were spot on. If I gave you one of these and didn’t tell you that I made them myself, you would have sworn I bought them from a bagel shop.

I had no problems working with the dough….other than I started to knead it in my stand mixer but changed my mind half way through and kneaded it the rest of the way by hand. It’s a simple dough and the combinations are endless! You can pretty much make any flavor your heart desires. I did Everything….the social outcast of the bagel world. Have you ever noticed how you when you buy a dozen bagels from Panera or something they put the Everything in it’s own little bag to keep it from contaminating the others with it’s salty/garlicky/oniony-ness. Kinda sad, don’t you think? Poor little Everything bagel…all by it’s lonesome when the other bagels get to party together in the big box. Sniffle, sniffle….I hope they will feel more included from now on. They will in my house, at least!

EVERYTHING BAGELS (Recipe Source: As seen on Pennies on a Platter, originally adapted from Baking Bites)

INGREDIENTS:

  • 1 tbsp active dry yeast
  • 1 tbsp sugar
  • 1 3/4 cups water, warm (100-110F)
  • 4-5 cups bread flour (not all purpose)
  • 1 tbsp salt
  • 1 egg, for egg wash

Seasonings I used:

  • Poppy Seeds
  • Dried minced onion
  • Sesame Seeds
  • Kosher Salt

DIRECTIONS:

  1. In a large bowl (or the bowl of a stand mixer) combine yeast, sugar and water. Let stand for 5 minutes, then stir in flour and salt. Mix dough thoroughly until it comes together in a large ball, pulling away from the sides of the bowl. Add an additional tablespoon of flour or water, if needed.
  2. If kneading by hand, turn dough out onto a lightly floured surface and knead until very smooth and elastic, about 10 minutes. If using a stand mixer, knead dough with the dough hook until elastic, about 8 minutes on a low speed. Place dough in a lightly greased bowl, cover with plastic wrap and let rise for 1 hour, or until doubled in size.
  3. When dough has risen, turn the dough out onto a very lightly floured surface and divide into 8 equal pieces (first quarters, then halves). Shape each piece into a tight ball, pinching the corners together at the bottom of the dough. When all the balls are shaped, let the dough rest for 30 minutes covered with a clean dish towel.
  4. Once dough balls have rested, the bagel shape can be formed. Using your fingers, poke a hole through the center of each dough ball. Stretch out the dough into a ring with your fingers and be sure to make the hole a little larger than you want the finished bagel to have, as it will shrink slightly while the bagel is expanding during the baking process. Let bagels rest for about 10 minutes.
  5. Meanwhile, bring a large pot of water to a gentle boil and preheat the oven to 400F. (I used a deep dish skillet because it’s wider.)  Line a baking sheet with paper towels and another baking sheet with parchment paper sprinkled with cornmeal.
  6. Working four at a time, drop the bagels carefully into the boiling water. Boil for 2 minutes on each side. Using a slotted spoon or strainer, transfer bagels to the paper towels to drain for a moment, then place on the parchment-lined baking sheet. Repeat process with remaining bagels.
  7. Brush boiled bagels with lightly beaten egg (a pastry brush is a good tool for this) and sprinkle with seasonings. Bake for 24 minutes, or until golden brown.  Cool completely on a wire rack (bagel will soften slightly as it cools).  Slice and toast to serve.

Note: The original recipe says that it will make 12 bagels. I made mine slightly larger and got 8.

ENJOY! 🙂

9 Comments

Filed under bread

I’m Ready for my Close Up

I’ve been wanting to make myself a little DIY light box for a while but I’ve been putting it off. Two reasons – 1. I am lazy. 2. I wanted Eric to do it for me because he is a mechanical engineer and thus very skilled at all sorts of building and fixing things and whatnot. He is a precise and analytical artist, measuring twice and cutting once. I’m more of an….abstract type artist. That usually leads to mistakes (whoops…wasn’t supposed to cut there…) and cursing ($@#*!) on projects such as this. Heh…

Eric has been way, way, way too busy lately to be worrying about constructing me a light box. He’s this.close to FINALLY being done with his MBA…two years in the making. I’m so very proud of him. Just one last push here. He hasn’t had much time for anything else but school and work as of late, so I wasn’t about to get on his case about something to improve my silly little blog. Plus, even if he did have a couple hours free to do something he enjoyed, I don’t think this project would be really high on his priority list when there are motorcycles to rebuild and lawn mowers to tinker with and cars that need oil changes. If I wanted a light box, I was going to have to tackle it myself.

One of the things that had me (and Eric) slightly concerned was having to store a big clunky box somewhere. We are very anti-clutter. We don’t like things sitting around. We’ve FINALLY cleared a whole bunch of crap out of our extra bedrooms and the basement that’s been sitting in there since we moved in nearly 4 years ago. Ahhhh…so liberating. We are about three months into our anti-crap campaign, and so far it’s working out great!! I’m not about to start RE-collecting crap and throwing it in there….but I really really REALLY wanted a light box…. A real blogger’s dilemma if ever there was one….hmmmmm….

Then….along came the solution to all my problems! Well, maybe not ALL my problems. I’m still not sure what to do about that pesky itching and burning (LOL. OMG…so totally kidding. Seriously, just joking around!!) Anyway, I spotted the plans for a COLLAPSIBLE light box that involved cutting notches into form core and then fitting them together to make the box. I spotted it over at Things Alauna Makes who saw it at Drawings in Motion! Collapsible?? Um, that’s pretty much EXACTLY what I was looking for! Big thanks to both of these awesome bloggers for the easy to follow instructions and tips.

I purchased the foam core (4 pieces total) from Hobby Lobby and the clampy lights and 60 watt daylight lightbulbs from Menards. It doesn’t cost much at all…20 or 25 bucks  of so. Not too shabby. I really got into this project tonight….think this kid:

bqcdaaaaawodanbnaaaabc5vdxqkfjn0yuxnu0x3m1jhc1q0al9vdjviufeaaaacawqkaxgaaaaec2l6zq1

so I didn’t take and pics of my steps. I forgot. Please check out the blogs linked above for step by step instructions and pictures. It’s far from perfect….there are for sure some pretty gnarly looking exacto knife slips here and there, but I think it will work. I had the most fun hunting around the house trying to find things to put in there to try it out. See, there cupoards are bare as I haven’t been to the store yet this weekend, so I didn’t really have anything fresh and colorful to put in there. I had to improvise. Here are some (somewhat improved) photos using my new setup. I’m still working on the best placement of the lights. It will take a bit of practice. Please note that I still used a photo editing software to clean them up a bit more. I use Google Picasa. It’s pretty basic, but it’s a free download and it’s easy to use. I recommend it! 🙂

Ooooo….purrrrrty. 🙂

The only thing I have in the house  that even remotely resembles fresh procduce…LEMONS! It’s 11:00 p.m. and it appears I have failed miserably at eating the rainbow today. Well, wait…that’s not entirely true…I’ve eaten things pasta, cheese and chocolate-colored. That counts, right?  Mmmm…

Speaking of pasta:

Aw, come on! Who spilled the pasta? Sheesh!

The persice and analytical artist at work: Eric made this rose for me out of sheet metal. It was the first flower he ever gave me…and it will last forever. Just like us! ::insert collective awwwwww here:: Seriously though…pretty neat, eh? I love my copper rose…it is one of my most cherished possesions. Le sigh…he’s so good…

And finally….pop the top on the Champagne of Beers to celebrate all this hard work. I can’t believe we actually have High Life TALLBOYS in our fridge. Heh. I’m totally collecting the cans and making windchimes out of them….it’s the only appropriate thing to do with empty cans of cheap beer. LOL. When I met Eric (at dollar High Life/Lite bottle night at Brother’s, ironically enough) he used to LIVE the High Life….his beer of choice. Not so much anymore. Now people like to bring it to him as a joke. We can’t get rid of it!

High Life anyone? Anyone? Bueller? Bueller?

3 Comments

Filed under blog upgrades

Let’s go to the Hop!

Have you ever seen the movie American Graffiti? No? Okay, I’ll just a wait a second while you go add it to your Netflix queue. Now please. Thanks.

::whistles and twiddles thumbs:: Got in there? GREAT!

This is one of my favorite movies! Personally recommended to me a few years ago by my dad, who never steers me wrong when it comes to movie recs. If he says he thinks I’ll like it, I do! American Graffiti is no exception. So the basic gist of the movie is four friends go out on the town for one last hurrah before college. They drive around, not necessarily with each other. That’s pretty much it. Okay, so that’s not it, but it’s all I’m going to say without giving too much away. It’s got a ton of big stars in it (when they were young) Richard Dreyfuss, Ron Howard, Harrison Ford, Suzanne Somers. Seriously, if you haven’t seen it, you should. It was nominated for Best Picture!!

So what does any of this have to do food, you ask? Well, the movie begins and ends in parking lot of Mel’s Drive In…A quintessential cultural icon of a days gone by. I always thought it would be fun to be a car hop girl….with the roller skates and all. They just opened a Sonic here in town…..a new career in my future perhaps? Heh.

Well, I’m probably not going to be a roller skating car hop, but I can bring a little bit of drive-in fun to my kitchen. My Soda Shop Cupcakes are a delicious chocolate cake, smothered in swirls of malted milk buttercream, dotted with sprinkles and topped with a cherry. And two straws, of course….so you can share with your steady before the sock hop. He sure is dreamy…..

Put on your poodle skirts, your saddles shoes, cue up your 45’s and ENJOY! 🙂

SODA SHOP CUPCAKES (Recipe Sources – Cake from Hershey’s, Frosting Adapted from Allrecipes.com)

CAKE:

  • Click here for cake recipe. I made the Hershey’s “Perfectly Chocolate” Chocolate Cake and halved the recipe. I got 12 good sized cakes. You can use any chocolate cake you like. Even a box!

FROSTING:

  • 1 /2 cup (1 stick) unsalted butter, at room temp.
  • 1 1/2 cups powdered sugar
  • 3/4 cup malted milk powder (not malt drink mix, just the regular powder)
  • 6 to 8 tablespoons milk
  • 2 tsps. vanilla extract

Cream butter in a mixer until very light and fluffy, about 5 minutes. Meanwhile, sift together powdered sugar and malted milk powder. Add to butter and mix until combined. Mix in vanilla. Add milk, a tablespoon at a time until you get the right consistancy for piping.

ENJOY! 🙂

15 Comments

Filed under chocolate, cupcakes

The Pasta Problem

Have you noticed how pasta has almost crossed over into the land of junk food? Sad, huh? Cookies, candy, pop and pasta? Hmmm…that doesn’t sound right, does it? You would think that you would have to eat all your pasta before you went ahead and had your cookies and candy. LOL. This makes me quite sad, seeing as I’m pretty much addicted to pasta, even if it is pretty much void of any and all nutritional value.

Luckily, there is a solution! I love the wide variety of whole wheat and whole grain pastas available now. They have really taken off! Where was the whole wheat pasta 5 years ago? 5 years ago, I was quite the conisour pasta…I would have starved to death in college without it, and I swear in all the time I spent in the pasta aisle I didn’t notice any whole wheat varieties! I’m sure they were there, but there was probably only one ot two to choose from. Now you can get it in almost any shape. Hooray! I can have my pasta and eat it too…and not feel like I’ve just stuffed my face full of a couple donuts and a case of Mountain Dew when I’m done. LOVE it! They are tad bit more expensive, but worth it, in my opinion. I have completely eliminated regular dried pasta from the house, except in special situations.

This meatless meal from Cooking Light is insanely delicious. Whole wheat pasta, chunky, meaty mushrooms, woodsy thyme…all smothered and baked up in an asisago cheese sauce. So.freakin.good. I swear you don’t even miss the meat! Even my meat loving hubby loves this one! MMMMM!

MUSHROOM RIGATONI BAKE (Recipe Adapted From: Cooking Light)

INGREDIENTS:

  • 8  ounces whole wheat penne
  • 2  teaspoons  butter
  • 1/4  cup  sliced shallots
  • 8  ounces  sliced button mushrooms, ( Okay, so the original recipe calls for shiitake mushrooms….however….those were not on sale at the store. Great price on the buttons this week so that’s what I used. I apologize for my foodie sin, I am a tightwad before anything else)
  • 4  ounces  sliced cremini mushrooms (aka Baby Bellas)
  • 1  tablespoon  chopped fresh thyme
  • 1/2  teaspoon  salt
  • 1/4  teaspoon  freshly ground black pepper
  • 3  garlic cloves, minced
  • 1  tablespoon  dry sherry (I subbed Marsala because that’s what I had on hand)
  • 1/4  cup  all-purpose flour
  • 2  cups  2% reduced-fat milk
  • 1  cup  (4 ounces) grated Asiago cheese, divided
  • Cooking spray
  • Thyme sprigs (optional)

DIRECTIONS:

  1. Preheat oven to 375°.
  2. Cook pasta according to the package directions, omitting salt and fat. Drain well. Set cooked pasta aside.
  3. Melt butter in a large nonstick skillet over medium-high heat. Add shallots; sauté 3 minutes. Add mushrooms, 1 tablespoon thyme, salt, pepper, and garlic; sauté 8 minutes or until mushrooms are tender. Add sherry; cook 1 minute, stirring frequently. Remove from heat.
  4. Place flour in a Dutch oven over medium-high heat; gradually add milk, stirring constantly with a whisk. Bring mixture to a boil; cook 1 minute or until slightly thick, stirring constantly with a whisk. Remove from heat; add 1/2 cup cheese, stirring until melted. Add pasta and mushroom mixture to cheese mixture, tossing well to combine. Spoon pasta mixture into an 8-inch square baking dish lightly coated with cooking spray; sprinkle evenly with remaining 1/2 cup cheese. Bake at 375° for 30 minutes or until cheese melts and begins to brown. Garnish with thyme sprigs, if desired.

ENJOY! 🙂

6 Comments

Filed under pasta, veggies

Twwaaallk to me, Illinoi-sssssss!

My craving for all things saucy, cheesey and carby this weekend got me thinking about my one and only trip to New York City and a dinner a couple of my gals and I had in Little Italy. During my junior year of college, I had the opportunity to go to NYC over spring break. For 2 hours of credit. Um, I signed up quicker than a New York minute. What a great way to spend spring break and earn some points toward graduation!

(Most of ;)) that trip was A-MAZ-ING. I had so much fun! Of course, our professor was so rattled by the behavior of some (not me, I swear. I swear, not me! I was NOT a troublemaker) that he vowed he was never taking students on that trip again. Perhaps more structured activities in the evening would have been a good idea, instead of turning 20 immature and rowdy college students loose in Manhattan, but hindsight’s 20/20, right? 😉

Anyway, one night a couple of friends and I were wandering around Little Italy in an awful, horrible, cold March rain. We were tired of walking, soaked to the bone, and freezing. Not to mention starving. We decided the next restaurant we saw, we’d go in and eat because we couldn’t stand walking anymore. We stumbled on a tiny, hole-in-the-wall place that was practically deserted. Hell if I can remember the name. We went inside, sat down and were immediately approached by a hilarious waitress who pulled up a chair and sat right on down to join us at the table and asked where we were from. She told us dirty jokes and made fun of us three blond haired, blue eyed very un-Italian looking girls. When she got up to bring us food and drinks, every time she walked by she’d yell at the top her lungs and her thick New York accent – “Twalk to me, Illinoi-sssss!” Complete with a hissing “s” on the end. Best.Dinner.Ever. What a blast!

So I guess Iowa is pretty far removed from NYC and Little Italy, but luckily the ingredients to put together some yummy Italian fare is available everywhere. More importantly, they are usually available in my fridge/pantry. I was looking for something easy to throw together using some stuff I had hanging around in the house. The result: turkey Italian sausage and spinach stuffed shells with quick kicked up tomato sauce. Easy and comforting. Totally hit the spot.

ITALIAN TURKEY SAUSAGE AND SPINACH STUFFED SHELLS WITH QUICK KICKED UP TOMATO SAUCE (Recipe source: This recipe came from me tossing together what I had in the house. I’m sure there are similar out there, but I really didn’t consult any sources before I put this together.)

‘Scuse the sloptastic photo, please. These types of dishes are never pretty on a plate. That’s just the way it is!

INGREDIENTS:

  • 1/2 box of jumbo shell pasta
  • 3 links sweet Italian turkey sausage, casings removed
  • 1 tsp. olive oil
  • 1 medium onion, chopped
  • 2 cloves of garlic minced
  • 1 28 oz can crushed tomatoes
  • Salt and freshly ground pepper to taste
  • 1 tsp. Italian seasoning
  • 1/4 to 1/2 tsp crushed red pepper flakes (depending on how much heat you like. I like mine HOT!)
  • 1 15 oz container ricotta cheese (I always use part skim)
  • 1 10 oz package frozen spinach, thawed and squeezed of excess moisture
  • 1/2 cup grated parmesan cheese
  • 1 cup shredded mozzarella cheese

DIRECTIONS:

  1. In a large pot of boiling water cook pasta until al dente (you can add a splash of olive oil if you are worried about them sticking together, but I just used a big enough pot so they had enough room to move around and had no problems.)
  2. In a large skillet, break up the sausage and cook until browned and no longer pink. Toss into a bowl and set aside.
  3. Heat oil in the same skillet. Add onion and cook until tender. Add garlic and cook one minute more. Add tomato, s&p, Italian seasoning and red pepper flakes. Bring to a boil then reduce heat and simmer uncovered for 10 minutes.
  4. To the sausage add ricotta, spinach and parmesam cheese, stir to combine. Scoop rounded tablespoons of mixture into pasta shells. Place in a greased 9X13 inch pan, cover with sauce, top with mozzarella cheese and bake in a 400 degree oven for 20 minutes or until heated through and the cheese melts.

ENJOY! 🙂

4 Comments

Filed under pasta, sausage, veggies